
Microcement Bathroom Projects
Shower enclosures, wet rooms, and full bathroom transformations — each one started with existing tiles and finished with a fully waterproof seamless system.


Why Bathroom Tiles Leak — and What Microcement Does Differently
Grout is porous. It absorbs water with every shower cycle, and over time it cracks — especially in wet rooms where steam and thermal movement are daily constants. Once grout cracks, water gets behind the tiles and into the wall structure. By the time the problem is visible, the damage behind the surface is usually significant. The fix is demolition.
Microcement bathroom systems eliminate the failure point entirely. Instead of a tiled surface with dozens of grout joints per square meter, the entire wet room becomes a single continuous envelope — floor, walls, shower enclosure, and ceiling all wrapped in the same seamless mineral coating with no joints for water to penetrate. The waterproofing is not just the surface sealer: a flexible liquid membrane is applied beneath the microcement across the entire wet zone, tanking the structure before the coating goes on top.
Mould follows moisture. Remove the grout joints — the recessed channels where moisture collects and sits — and you remove the environment mould needs to establish. A sealed microcement surface has no crevices, no recessed lines, and no porous material. Cleaning a microcement shower is a wipe-down, not a scrubbing session.
Slip resistance in a wet room is a technical requirement, not a styling option. Bathroom floor zones are textured to achieve R12 slip resistance — the standard for permanently wet surfaces — without the rough, utility-floor appearance of anti-slip tiles. The texture is calibrated for bare feet on wet floors: enough grip for safety, fine enough to feel refined underfoot.
What a Microcement Bathroom Delivers
Full Waterproof System — Not Just a Sealer
The waterproofing is built in two layers: a flexible liquid membrane tanking the entire wet zone beneath the coating, and a moisture-stable polyurethane sealer on top. Both layers working together, not one relying on the other.
No Grout — No Mould Environment
Grout joints are where mould establishes. Remove the joints and you remove the environment. A sealed microcement surface has no recessed channels for moisture to sit in — cleaning is a wipe-down, not a scrubbing session.
R12 Non-Slip on Wet Floor Zones
Bathroom floor areas are textured to achieve R12 slip resistance — the correct standard for permanently wet surfaces. Calibrated for bare feet: enough grip for safety, fine enough to feel refined underfoot.
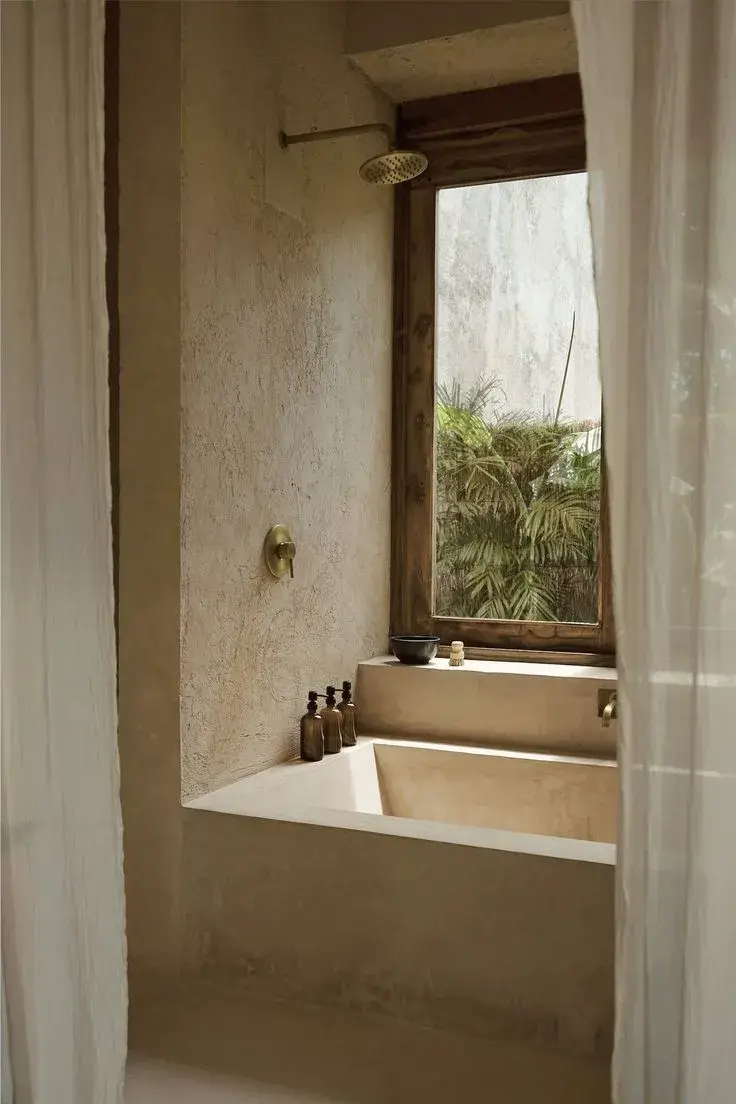
Continuous Floor-to-Ceiling Coverage
Shower enclosures, wet room walls, vanity surrounds, and basin areas all wrapped in the same material. No transition between floor and wall. No separate products for different zones. One continuous surface throughout.
Applied Over Existing Tiles
Your existing bathroom tiles stay in place. No demolition, no rubble, no weeks of disruption. The tiles are assessed, ground for grip, and the waterproof microcement system is applied on top.
Complex Geometry Covered Seamlessly
Shower niches, curved walls, integrated basins, and drain surrounds — all wrapped in continuous microcement. No awkward tile cutting at curves. No visible joins at transitions between surfaces.
How a Waterproof Microcement Bathroom Gets Installed
Bathroom installation has more critical stages than any other surface — because water is present every single day. Every stage below is non-negotiable. Skipping or rushing any one of them produces a failure that requires full demolition to correct.
Moisture and Substrate Assessment
Moisture readings are taken at multiple points across floors and walls before any preparation begins. Existing tiles are tap-tested individually to identify hollow spots, failed adhesive, and any sections with active water damage behind them. Any hollow tile is a structural weakness that transfers directly through to the microcement above — these must be fixed or replaced before the system goes on. Crack mapping documents every existing crack, which are classified as active or settled and treated accordingly.
Surface Preparation
Diamond grinding removes surface glaze from existing tiles, strips old sealers and soap residue, and creates the mechanical surface profile that the bonding primer and liquid membrane require. On walls, fine-grit sanding achieves the same result. Grout joints on tiled surfaces are filled flush and allowed to cure fully before proceeding. The result is a structurally stable, uniformly profiled surface across the entire wet zone — floor and walls.
Liquid Waterproof Membrane
A high-flexibility liquid membrane is applied by brush and roller across the entire wet zone — floor and walls — in multiple coats, each allowed to cure fully before the next. The membrane is taken up wall surfaces to the correct height and overlapped at all floor-wall junctions. Drain surrounds and any wall penetrations are reinforced with membrane fabric tape before the liquid coats go on. This stage creates the structural waterproof tank — the layer that keeps the building dry regardless of what happens to the surface above it.
Bonding Primer and Reinforcement Mesh
A moisture-tolerant bonding primer formulated for wet environments is applied over the cured membrane. Fiberglass reinforcement mesh is pressed into the wet primer across the full floor area and any wall areas subject to thermal movement — fully embedded, no air pockets, no gaps. This mesh layer absorbs the building movement and thermal cycling that would otherwise transfer as cracks through the microcement above.
Structural Base Coats
Two structural base coats of microcement are applied by hand trowel. Each coat is dried fully — between 12 and 24 hours depending on ambient humidity in the bathroom — and sanded before the next goes on. Drying times in wet rooms require closer monitoring than in open living spaces: steam residue and humidity levels affect how each coat sets. The two base coats provide compressive strength, establish colour depth, and bridge any remaining minor surface imperfections.
Finish Coat, Slip Texture and Moisture-Stable Sealer
The finish coat is hand-troweled in a single continuous pass across each surface. Anti-slip aggregate is worked into the floor finish coat at this stage to achieve R12 slip resistance on all wet floor zones. Once the finish coat has cured fully, a moisture-stable polyurethane sealer is applied in multiple coats — formulated specifically for wet room environments and resistant to the soap, shampoo, and cleaning product chemistry of daily bathroom use. Light use after 48 hours. Full wet room use after 7 days.
Bathroom Colour Options
Lighter tones make small bathrooms feel larger and brighter. Darker tones create drama in larger wet rooms. Every colour is a mineral pigment mixed through the full depth of the material — not a surface coating that wears off.
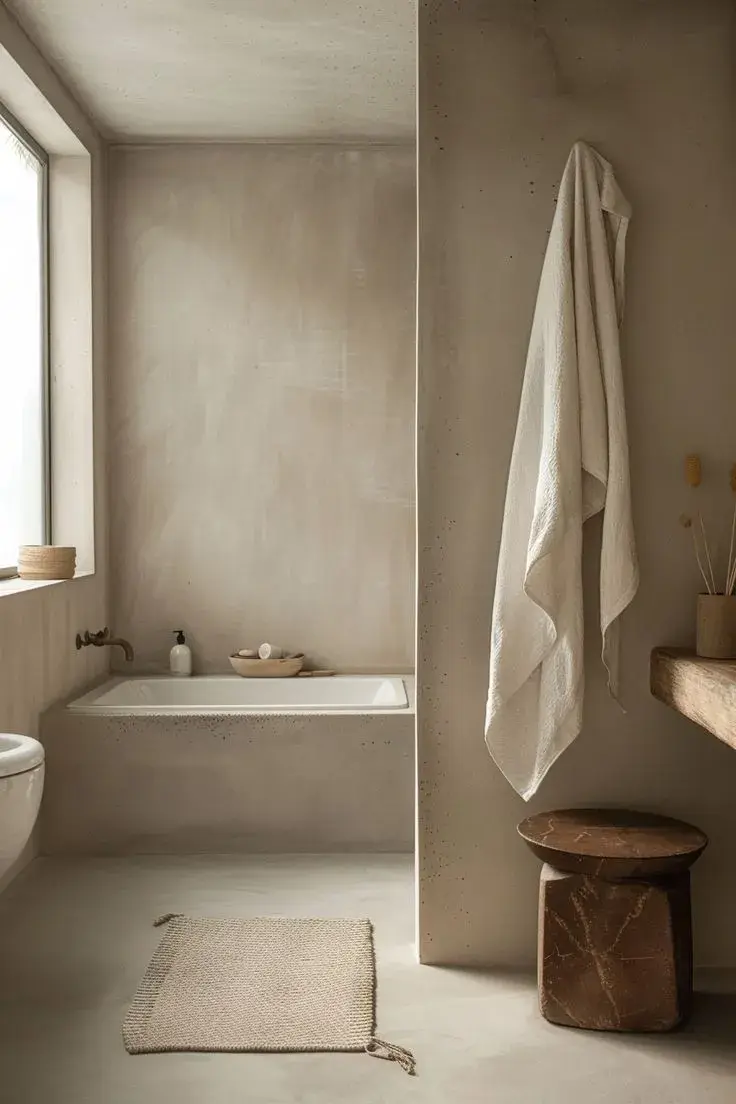
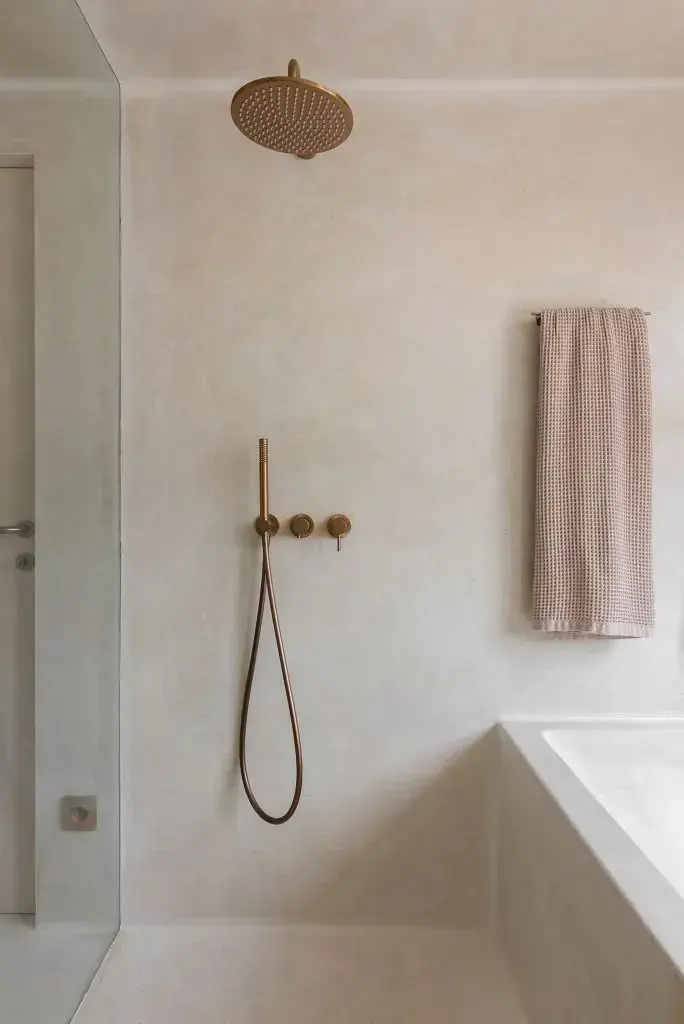
Mist White
A bright, clean mineral white that maximises light reflection in enclosed bathroom spaces. The most popular choice for compact wet rooms and family bathrooms.
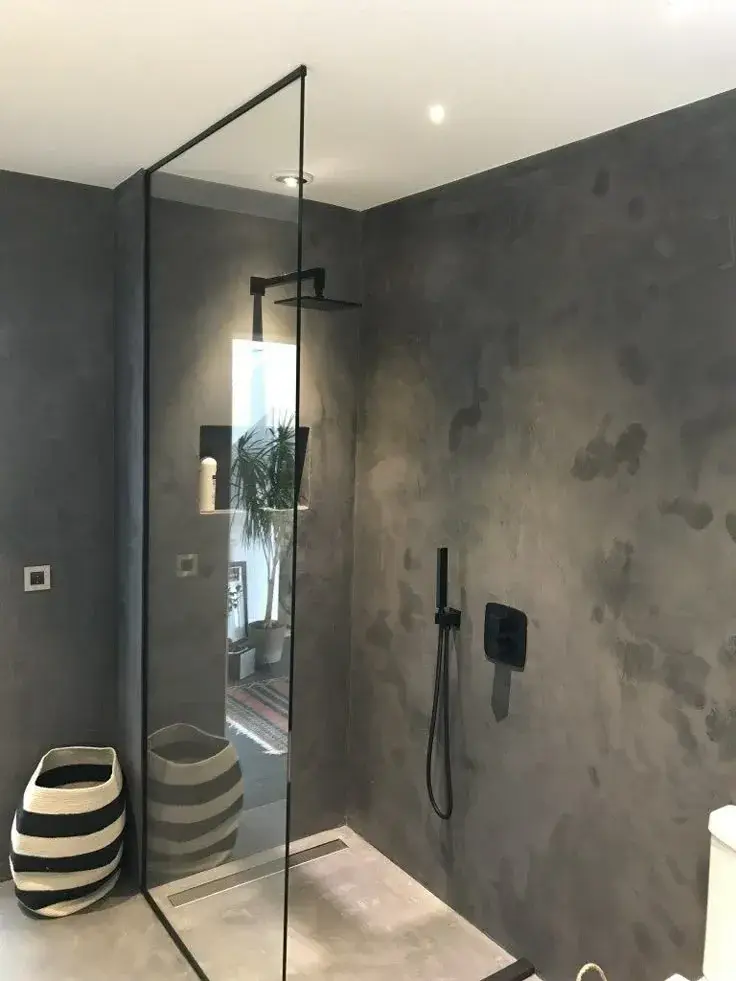
Slate Grey
A deep charcoal grey for a dramatic, architectural wet room. Works best in larger bathrooms where the dark tone creates atmosphere rather than closing in the space.
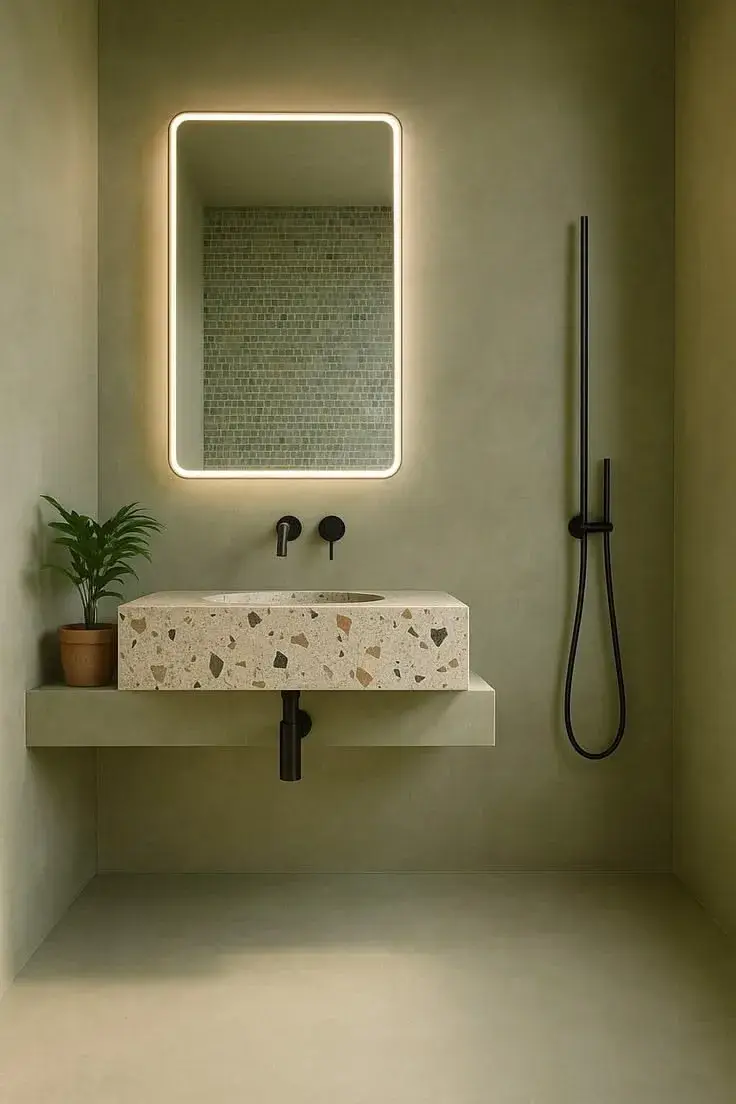
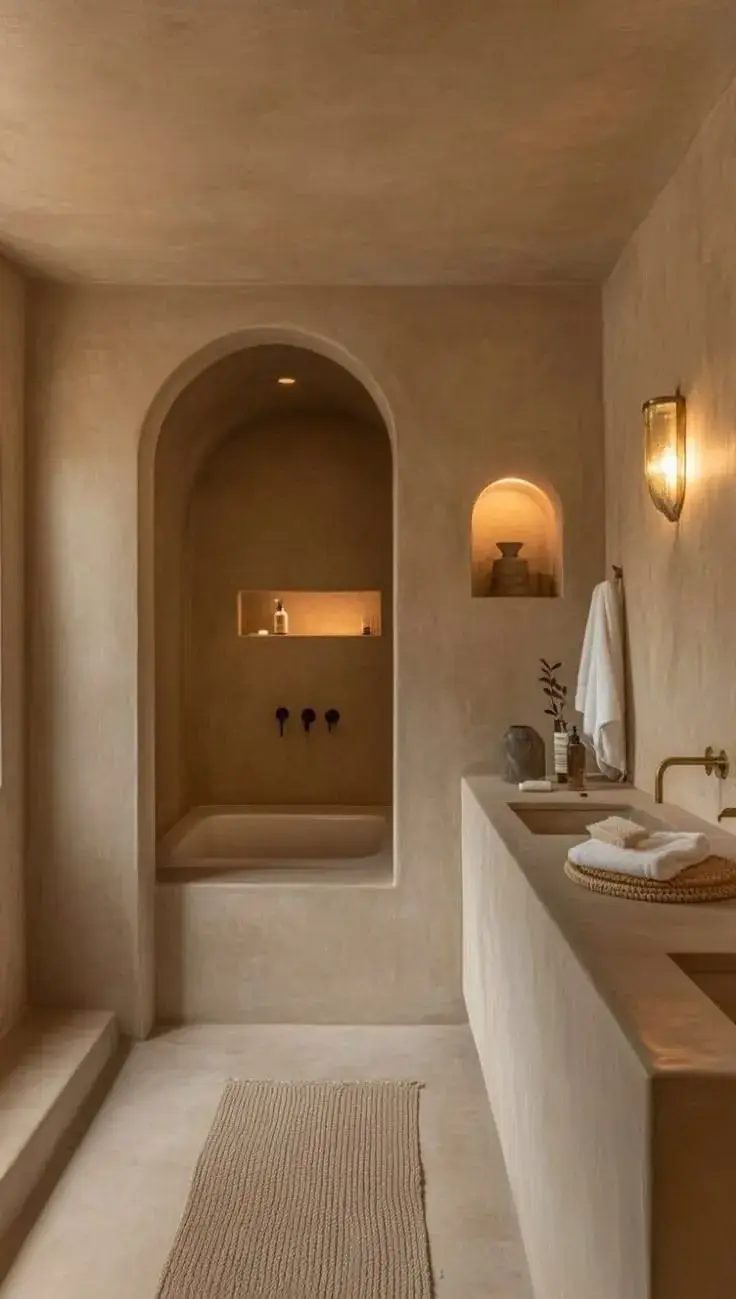
Sage Mineral
A soft, muted sage green with a polished mineral surface. An unusual choice that creates a calm, spa-like atmosphere — increasingly popular for master bathrooms.
Microcement Bathroom — Questions Answered
Yes — when installed with the correct system. The waterproofing is not just the surface sealer. A flexible liquid membrane is applied beneath the microcement across the entire wet zone, tanking the structure before the coating goes on top. This two-layer system — membrane underneath, sealed microcement on top — means no water reaches the wall structure regardless of what happens at the surface level.
Not when correctly specified. Bathroom floor zones are textured to achieve R12 slip resistance — the standard for permanently wet surfaces. Anti-slip aggregate is worked into the finish coat during application. The result is controlled grip for bare feet in wet conditions without the rough, industrial appearance of anti-slip tiles.
Yes — provided every tile is stable and properly bonded. The existing tiles are assessed, tap-tested, and ground for grip. Any hollow or lifting tiles must be fixed first — they are structural weaknesses that transfer through to the new surface. Once the substrate is confirmed stable, the waterproof microcement system is applied on top. No demolition, no rubble.
Wipe down with a soft cloth and a pH-neutral soap or shower cleaner. That is the entire routine — no grout lines to scrub, no crevices trapping soap residue. Avoid harsh chemicals, bleach, and abrasive cleaning pads: these degrade the sealer. Rinse surfaces after use to prevent soap and shampoo residue from building up on the sealed surface.
The polymer content in the mix allows the material to flex slightly with the thermal expansion from hot water and steam without cracking. The moisture-stable sealer is formulated for continuous steam and humidity exposure. The liquid membrane beneath ensures that any moisture that does work through the surface is stopped before it reaches the wall structure.
Drain surrounds are reinforced with waterproof membrane fabric tape before the liquid membrane coats go on — the junction between floor and drain is the most failure-prone area in any wet room and receives specific attention at every stage. The microcement is brought flush to the drain edge and sealed with a flexible, waterproof trim detail.
The microcement coating is cement-based and does not degrade. The waterproof membrane beneath is permanent. What needs maintenance is the surface sealer — refresh it every 3 to 5 years in a regularly used family bathroom, more frequently in a high-use commercial wet room. Every installation is covered by a 3-year written warranty against peeling, blistering, and sealer failure.
5 to 7 working days for a full bathroom — covering substrate assessment and preparation, membrane application and cure, base coats, finish coat, and sealer. The membrane cure stage requires 24 hours before the microcement system can go on top, and the full system needs 7 days before wet room use. Light use — handwashing — is possible 48 hours after the final sealer coat.
Send Us a Photo of Your Bathroom. We Will Tell You What Is Possible.
WhatsApp us a photo of your current bathroom and tell us what you want to change. You will get an honest assessment: whether microcement is the right choice for that space, what preparation it would need, and what it would cost.