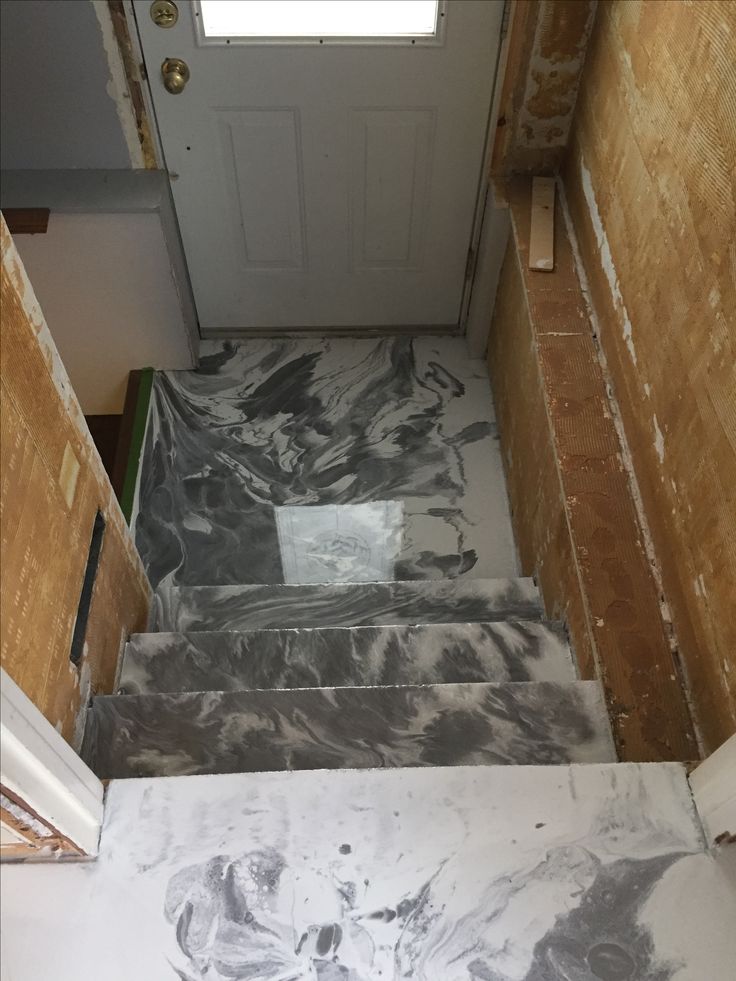
The Engineering Difference Between a Floor and a Staircase Application
Applying metallic epoxy to a floor and applying it to a staircase are fundamentally different engineering challenges. A floor receives distributed load across its entire surface — the stress is spread. A staircase concentrates impact into a very small area with every footstep: the nosing, the leading edge of the tread. Every time a foot lands on a step, the entire weight of the body plus the momentum of movement is delivered to this narrow horizontal edge. Over thousands of footsteps, this concentrated impact will cause a rigid coating applied over a sharp 90-degree concrete edge to chip and fail.
The second challenge is coverage continuity. An aesthetically complete staircase application covers all three elements: the horizontal tread, the vertical riser, and the side panel. Each of these surfaces is at a different angle and receives resin at a different viscosity behavior. Treads self-level naturally like floors. Risers require thixotropic modification to prevent dripping. Side panels require a separate preparation and application approach. Managing all three simultaneously without visible application joins or drip marks requires a level of coordination that distinguishes professional installations from amateur attempts.
The third challenge is safety. An unsealed or standard-gloss staircase tread is one of the most dangerous surfaces in a building — it combines a concentrated impact zone with a high-gloss slip surface at a potentially fatal height. Every professionally installed staircase system must integrate anti-slip treatment into the tread sealer as a non-negotiable part of the installation.
In Saudi Arabia's multi-floor villa architecture — where three to four-floor buildings are standard and the staircase is the visual centrepiece connecting every level — the staircase surface receives more daily scrutiny than any other floor finish in the home. The typical Saudi villa staircase is clad in marble with stainless steel nosing strips: impressive when new, but prone to grout cracking at nosing edges, loose metal strips that create trip hazards, and the permanently cold, acoustically harsh feel of stone underfoot. A metallic epoxy staircase system with embedded structural nosing reinforcement replaces this with a seamless warm-toned surface flowing from ground floor to roof level — without a single metal strip, silicone joint, or detached nosing ever needing maintenance.
Three Engineering Outcomes of a Professional Metallic Epoxy Staircase
Ground Floor to Landing — One Unbroken Surface
The metallic epoxy staircase system flows from the ground floor up every riser and tread to the landing level without a single metal strip, carpet edge, or threshold transition.
Anti-Slip Permanently Embedded in the Tread Sealer
Rounded quartz aggregate is locked into the tread topcoat during application — not applied as a separate strip. It cannot peel, lift, or collect dirt at its edges.
Nosing Reinforced Before the Resin Is Poured
Every nosing is bullnose-profiled or fitted with a metal angle bead before any resin is applied. This structural step distributes impact force rather than concentrating it at a brittle corner.
Staircase System Technical Specifications
| Property | Value |
|---|---|
| Nosing Profile Treatment | Minimum 3mm radius bullnose or embedded metal angle |
| Tread Anti-Slip Classification | R10 – R11 (residential) / R12 (commercial) |
| Riser Viscosity | Thixotropic modified — anti-sag formulation |
| Abrasion Resistance at Nosing | High — tested per ASTM D4060 |
| Light Traffic on Treads | 24 – 48 hours post-topcoat |
Staircase Resin Installation — Full Technical Sequence
Structural Assessment: Substrate, Fixings, and Movement
Every step is physically tested for movement — any step that flexes, squeaks, or moves when loaded must be investigated and remedied before the rigid epoxy system is applied. Rigid coatings over a moving substrate will crack at the movement point within weeks. On wooden staircases, all treads and risers must be mechanically fixed to the stringer with screws (not just nailed or glued). On concrete staircases, the structural integrity of the concrete is confirmed by tap-testing the surface and probing for any delaminated sections.
Nosing Engineering — The Critical Structural Step
Before any resin is mixed, we address the most important structural detail on the staircase: the nosing profile. Sharp 90-degree concrete or timber edges are fundamentally incompatible with a rigid resin coating under impact loading. We modify every nosing using one of two methods: 1) Bullnose profiling — grinding or routing the sharp corner to a minimum 3mm radius curve so the resin wraps around the edge rather than spanning a brittle corner; or 2) Metal angle embedding — fixing a stainless steel angle bead into the nosing surface before the pour, providing a permanent, reinforced protective edge that the resin bonds to and terminates against. The method chosen depends on the substrate material and the expected traffic intensity.
Surface Preparation: Treads, Risers, and Side Panels
Each surface type is prepared differently. Treads are diamond ground using small, handheld angle grinders with diamond cup wheels (standard planetary grinders are too large for stair treads) to CSP 2-3 profile. Risers are sanded with 40-grit orbital sanders as for wall preparation. Existing carpet adhesive, paint, and wood stains are stripped. All joint lines between treads, risers, and side panels are inspected and any loose or crumbling material is removed and filled with fast-setting repair mortar before priming.
Penetrating Primer — All Surfaces
A low-viscosity penetrating primer is applied across all prepared surfaces simultaneously. Because the staircase is a continuous architectural element, the primer must be applied to all surfaces in a single session to establish a consistent inter-coat adhesion window across the whole staircase. The primer is back-rolled to ensure complete surface coverage, including the junction areas between treads and risers where two planes meet.
Metallic Pour — Controlled, Floor-to-Top Sequence
The metallic resin is applied working upward from the bottom tread to the top landing. Each tread is poured and spread first, then the riser below it is coated using thixotropic-modified resin applied by brush and foam roller. Working upward prevents the installer from contaminating already-poured surfaces below. The side panels are coated last on each step. The installer must maintain a wet edge at every intersection point to prevent visible join lines in the finished surface.
Anti-Slip Tread Sealing
The cured metallic layer is lightly abraded with 180-grit to remove any surface contamination. The aliphatic polyurethane topcoat is applied to all surfaces. Critically, while the topcoat on treads is still wet, the correct-grade anti-slip aggregate is broadcast evenly across the tread surface only — not onto risers or side panels, where the smooth finish is retained for aesthetics. A second seal coat locks the aggregate permanently. The resulting tread surface provides classified anti-slip performance in both dry and wet conditions.
Technical Questions on Resin Staircases
Yes. Any existing damage to the nosing area — chips, cracks, or crumbling concrete — must be repaired with structural repair mortar and cured fully before preparation begins. If damaged nosing material is coated directly, the damaged zone will continue to fail beneath the coating and will cause the epoxy above it to eventually delaminate in that area. Nosing repair is a standard part of our preparation scope on older staircases.
Yes, but the tack strips and any carpet staples must be fully removed first. The holes left by tack strip nails and staples are filled with wood filler and sanded flush. The wood surface is then sanded and primed with a wood-penetrating primer before the epoxy system is applied. Flexing wood requires that we confirm the staircase is completely rigid — any movement or flex in wooden stairs will eventually transmit as a crack through the rigid epoxy coating.
We use rounded quartz aggregate for residential staircases, not sharp aluminum oxide. The particle shape is smooth enough for bare feet while providing sufficient grip for wet or socked feet. The aggregate is embedded into the topcoat rather than sitting loose on the surface, so it does not have the rough sandpaper sensation of loose-aggregate surfaces.
The metallic pigments on the staircase will use the same color system as the floor, but the pattern will be different. On floors, the pigments flow freely and create expansive formations. On stair treads, the smaller surface area and contained flow creates a more concentrated, individual pattern per tread. The color palette and metallic depth will be consistent; the pattern will be uniquely different on each step.
For a standard residential staircase of 12–14 treads, installation takes 3 to 4 days. The staircase is completely inaccessible during this period as the wet resin must not be disturbed. In multi-storey buildings where the staircase cannot be taken completely out of service, we install temporary boarding over each tread on a step-by-step basis, protecting the freshly poured resin while allowing controlled foot access.
Assess Your Staircase for a Resin System
Send us photos of your staircase substrate and the number of treads to begin the technical assessment.