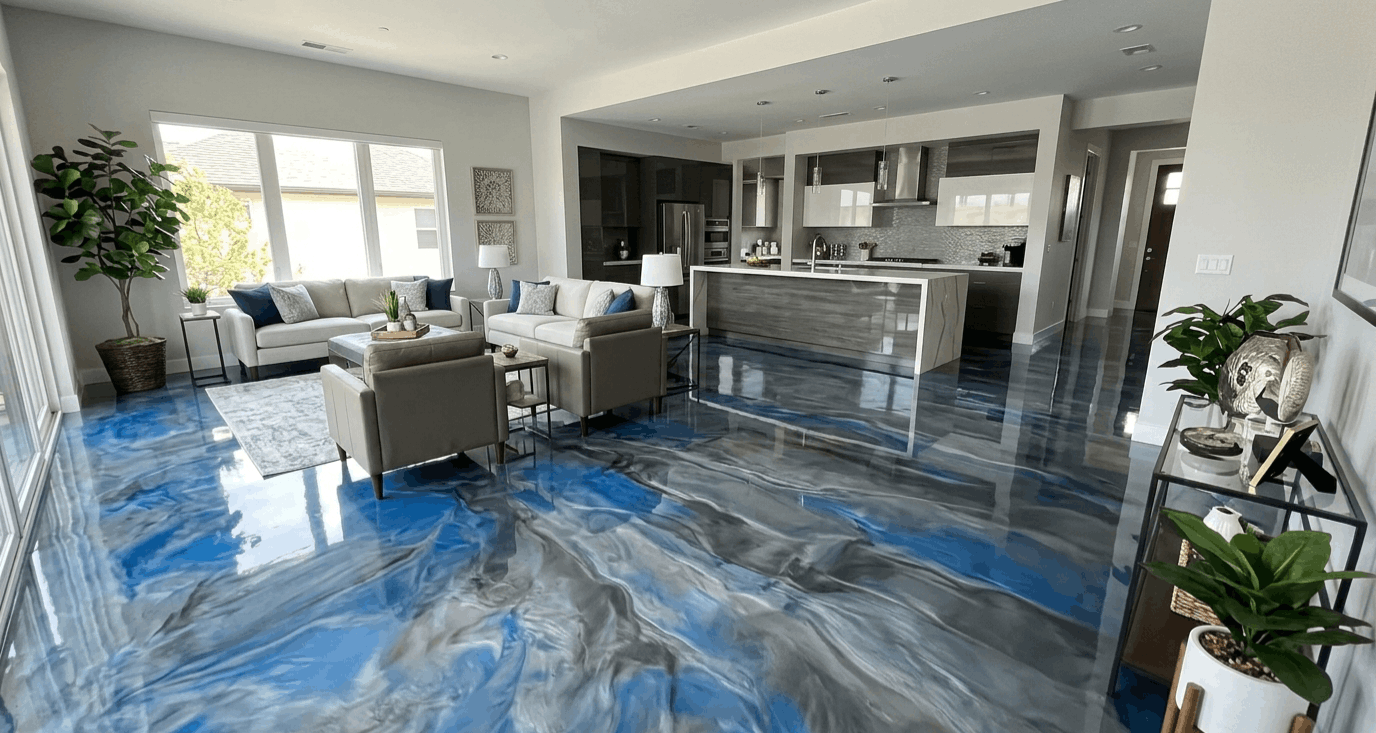
Designing a Home Floor Around Health, Comfort, and Visual Unity
When planning a metallic epoxy residential floor for a family villa, health and safety take absolute priority over visual design. The most pressing questions are not about color, but chemistry: Is it safe to breathe around during installation? Will it off-gas into the indoor air for years? Can a toddler play on it without serious injury? Will the dog's claws destroy the surface? How does it behave over an underfloor heating system? A correctly specified residential resin system provides technically robust answers to every one of these concerns.
The most significant design benefit in residential applications is architectural continuity. Traditional homes accumulate flooring transitions over the years — tile in the kitchen, hardwood in the living room, carpet in the bedrooms, marble in the entrance hall. Every material change requires a threshold strip that gathers dirt, presents a minor trip hazard, and visually fragments the floor plan into disconnected zones. A whole-home metallic resin system removes every transition. The resin flows through doorways continuously, uniting the entire floor plan under one surface. In open-plan villas, this continuity makes the living space feel substantially larger.
The second key residential advantage is hygiene. Carpet traps dust mites, pet dander, pollen, and bacterial colonies that no amount of vacuuming fully removes. Grouted tiles accumulate deep microbial contamination in the joint material that surface mopping does not reach. A non-porous seamless resin surface supports none of these biological communities. Allergens sit on the surface and are removed with a single damp mop pass. For families with asthma, hay fever, or young children with developing immune systems, this is a genuine health improvement, not merely a marketing claim.
Saudi Arabia's villa construction presents a specific opportunity for whole-home metallic epoxy that is rarely available in other markets. The typical Saudi family home — a three to four-floor villa of 400 to 800 square metres — is finished almost universally with large-format marble or porcelain tile. While impressive at installation, these surfaces create practical problems that Saudi families experience daily: the acoustic hardness of tile amplifies footstep noise across large open-plan spaces, grout lines in high-traffic areas collect the fine silica dust that enters from KSA's arid environment, and the polished stone surface requires quarterly professional maintenance to retain its reflectivity. A whole-home metallic epoxy system installed without demolition across the entire villa resolves all three of these issues in a single coordinated project.
Five Ways Metallic Epoxy Residential Flooring Serves Family Living Better Than Tile
Hypoallergenic — No Dust Mite Habitat, No Grout Mold
Non-porous and jointless. Allergens sit on the surface and are removed in one mop pass. No grout lines for mold and no carpet fibers for dust mites to colonize.
Underfloor Heating Conducts Faster at 3mm Thickness
At only 3mm total build, the resin conducts heat from underfloor elements faster and more efficiently than a 10mm ceramic tile system. Reaches target temperature with less energy.
Every Room Connected — No Threshold Strips Anywhere
Flows through every doorway in the villa without a transition strip. Living rooms, hallways, kitchens, and bedrooms share one surface. Dirt-trap thresholds eliminated completely.
Completely Inert After 7-Day Cure — Zero Indoor VOC Emission
Once fully cured, the polymer emits nothing into the indoor air. Confirmed by EN 16516 emissions testing: zero detectable VOCs at 28 days post-installation.
Pet Friendly — Claws Cannot Penetrate the Structural Layer
Dog claws will not damage the structural epoxy. Micro-scratches in the topcoat after years of heavy use are resolved with a simple topcoat refresh — without touching the metallic design below.
Indoor Air Quality — What Happens to VOCs During and After Installation
The honest chemistry behind epoxy odor and long-term air safety.
VOC Emissions During Application and Initial Cure
During the liquid application phase, two-part epoxy resin undergoes an exothermic chemical reaction — heat is released and volatile components of the hardener and resin evaporate into the air. This creates a noticeable odor and measurable VOC content in the air above the wet floor. The home must be vacated and well-ventilated during application and for 48–72 hours afterward. This is not negotiable — adequate ventilation is required by health and safety regulations and ensures that the curing VOCs are diluted below harmful concentration. Our specifications include a ventilation protocol as a mandatory part of the installation documentation.
Post-Cure: Complete Inertness and Long-Term Air Safety
Once the epoxy has completed its cross-linking reaction — typically 7 days at standard room temperature — the polymer is a fully cured solid. A cured thermoset polymer does not off-gas. The molecular structure is locked in a permanent three-dimensional network that has no mechanism for releasing chemical components at room temperature. Independent third-party emissions testing under EN 16516 (the European standard for construction product VOC emissions) confirms that correctly cured epoxy flooring emits zero detectable VOCs 28 days after installation. This makes it one of the lowest-emission flooring options available — significantly cleaner than most carpets, vinyl planks, and engineered wood products that continue releasing plasticizers and adhesive VOCs for months.
Installing Metallic Epoxy in a Family Home — The Residential Protocol
Whole-Home Survey and Phased Installation Planning
Installing a seamless floor through an entire villa requires careful sequencing to maintain the continuity of the surface across doorways and open-plan areas while managing the reality that most families cannot vacate their home entirely for a week. During the survey, we produce a phased installation plan that divides the home into sections that can be installed sequentially, with each phase protecting the previous phase's cured resin surface during the subsequent phase's preparation and pour. Typically this means completing bedrooms first, then sealing them off while the living areas are installed, then completing the kitchen and entrance last.
Furniture Removal and Existing Floor Assessment
All furniture is removed from the phase being prepared. The existing floor is assessed: all ceramic or porcelain tiles are tap-tested for hollow areas, any hollow tiles are removed and the substrate is patched. Grout joint depths and heights are measured — significant joint height differences (more than 2mm) require a skim coat of self-levelling compound to prevent telegraphing through the thin resin system. In areas with existing hardwood or engineered wood floors, the timber must be assessed for structural soundness and confirmed to be completely immovable before the resin system is applied.
HEPA-Controlled Diamond Grinding — Dust Management for Occupied Homes
Grinding in an occupied home requires a significantly higher standard of dust management than a commercial site. We use only machines with directly-attached industrial HEPA vacuum systems — capturing dust at the source before it can disperse into the building. Doorways to adjacent occupied areas are sealed with zipper-lock dust control sheets. Air purifiers with HEPA filtration are placed in adjacent spaces as a secondary precaution. Grinding is conducted zone-by-zone, with thorough vacuum cleaning of all surfaces before moving to the next zone. The family can remain in the home in the sealed-off sections during this process.
Moisture and Vapor Barrier Assessment — Critical for Ground Floor Rooms
Ground floor rooms in Saudi Arabian villas are typically on a slab-on-grade foundation. These slabs sit directly on the ground and are susceptible to moisture vapor rising from the soil beneath — particularly during cooler months when the temperature differential between the soil and the interior drives vapor upward. If this vapor is trapped beneath an impermeable epoxy coating, it will cause blistering and delamination. Every ground floor room receives a moisture vapor emission rate test using calibrated measurement equipment. Rooms showing elevated MVERs receive a moisture-mitigating primer system before the standard installation proceeds.
The Metallic Pour — Wet-on-Wet Doorway Transitions
The critical technical challenge in a whole-home pour is achieving seamless continuity through doorways between phases. When Phase 1 (bedrooms) has cured and Phase 2 (hallway) is being poured, the junction at the doorway must be managed as a wet-on-wet join: the Phase 2 resin must be poured and merged with the Phase 1 edge while Phase 2 is still in its gel window. To achieve this, the Phase 1 edge is abraded to remove the surface oxidation layer, a fresh coat of primer is applied, and the Phase 2 pour is brought precisely to the junction and merged with a feathering technique. When correctly executed, the resulting join is invisible in the finished floor.
Low-VOC Topcoat, Ventilation Protocol, and Re-Occupation
We select the lowest-VOC formulation of aliphatic polyurethane available in the topcoat specification for residential applications. After the final topcoat is applied, all windows are opened to maximize through-ventilation. Mechanical ventilation (HVAC system fans, portable air circulators) is run continuously for 48 hours. We provide the homeowner with a re-occupation protocol: light access to sealed bedrooms after 48 hours, normal occupation of all areas after 72 hours, and full return of all furniture after 7 days. Children and pets should not be in the space until the 72-hour ventilation period is complete.
Questions Families Ask Before Installing Resin Flooring
After the full 7-day cure period, the floor is chemically inert and emits zero VOCs. It is safe for contact with skin and for the proximity of infants. The surface is non-porous and does not harbour the dust mites, pollen, and bacterial colonies that carpet and grouted tile surfaces accumulate. The surface hardness (Shore D 72+) means there is no surface material that can be abraded and ingested. The main safety consideration for toddlers is the smoothness of the standard finish — we recommend incorporating an R10 anti-slip broadcast aggregate in areas where toddlers are learning to walk.
Large, active dogs will create micro-scratches in the aliphatic polyurethane topcoat over time — particularly in their regular paths between feeding areas, sleeping spots, and the garden. These micro-scratches accumulate gradually and are most visible under raking light. The structural epoxy beneath the topcoat will not be damaged. When the topcoat reaches a point of noticeable wear (typically 4–7 years in a home with multiple large dogs), a topcoat refresh — applying a new thin coat of aliphatic sealer over the existing floor — fully restores the surface to its original condition without touching the metallic design below.
Yes, provided the underfloor heating system is confirmed to be functioning and pressure-tested before the floor installation begins. The heating system must be turned OFF during the entire installation period — from preparation through to 7 days after final topcoat. After the 7-day cure period, the heating can be resumed but must be brought up gradually: set to 18°C for the first 3 days, then 22°C for the following 3 days, then to its normal operating temperature. Rapid thermal ramping of a freshly cured system risks thermal stress in the early stages of the polymer network formation.
You do not need to vacate the entire home if we install in phases. However, each phase zone must be completely empty during preparation and pouring, and must be closed off with no foot traffic for 48 hours after the topcoat is applied. The home should be well-ventilated (windows open, HVAC running) for the full 72 hours after each phase's topcoat. Children and pets should be kept away from each completed phase for 72 hours. After 72 hours, light barefoot access is safe. Furniture returns at 7 days.
The resin system is 3mm thick and will follow the existing floor level. It will not self-correct significant height differences between adjacent rooms — a step of more than 5mm between rooms requires a dedicated levelling compound application to bring the lower area up to match the higher area before the resin system is applied. Minor undulations within a room (up to 3mm over 2 metres) are typically absorbed by the self-levelling nature of the poured resin without any pre-levelling compound.
Plan Your Whole-Home Resin Floor
Share your villa floor plan with our residential team to design a phased installation that works around your family's schedule.